Track your Facebook and Instagram ad sales back to Meta Ads Manager, with no integration rules to build.
When you spend money on ads, you need to know which ones are bringing in revenue. Add your Meta Pixel ID and access token to SamCart, and SamCart reports every sale to Meta two ways at once: through the pixel on your checkout page, and through the Meta Conversions API (CAPI) from SamCart's servers. The two work together, giving Meta the best chance of matching each sale to the ad that produced it, even when a browser blocks the pixel.
From there, you can track your Return on Ad Spend (ROAS) down to the dollar and know exactly when to scale up.
Existing accounts: one purchase event per order (explained below) is part of an update that existing accounts will be able to switch on soon. Until you switch, SamCart sends a purchase event for each charge. See How purchase events are counted below.
Add your Meta Pixel ID and access token
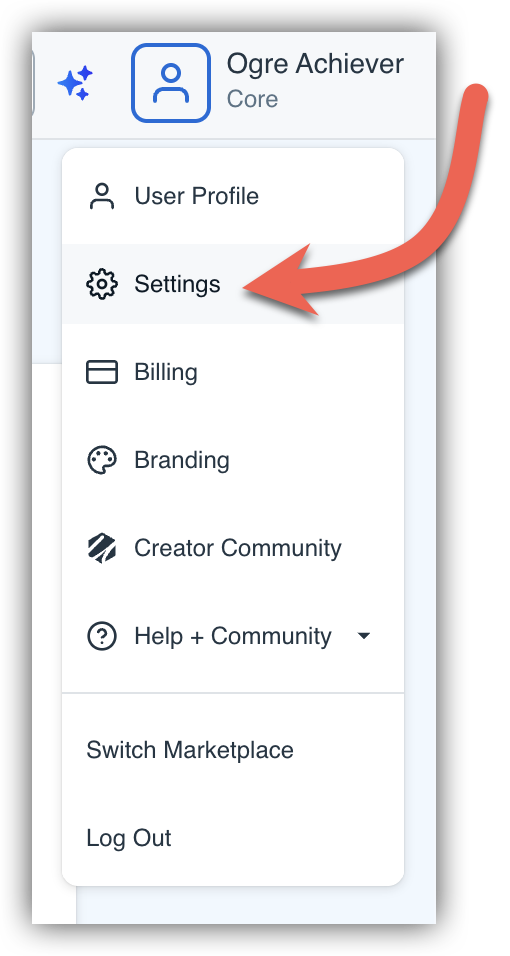
To get started, click your profile icon in the top right corner of your dashboard and select Settings.
Click the Tracking & Pixels tab and turn on the Meta Pixel Tracking toggle. Two fields appear: Pixel ID and Access Token. Both are required, so grab both from Meta before you save.

Your Meta Pixel ID is usually 15-16 digits. If you need help creating a pixel or finding its ID, see this help article from Meta.
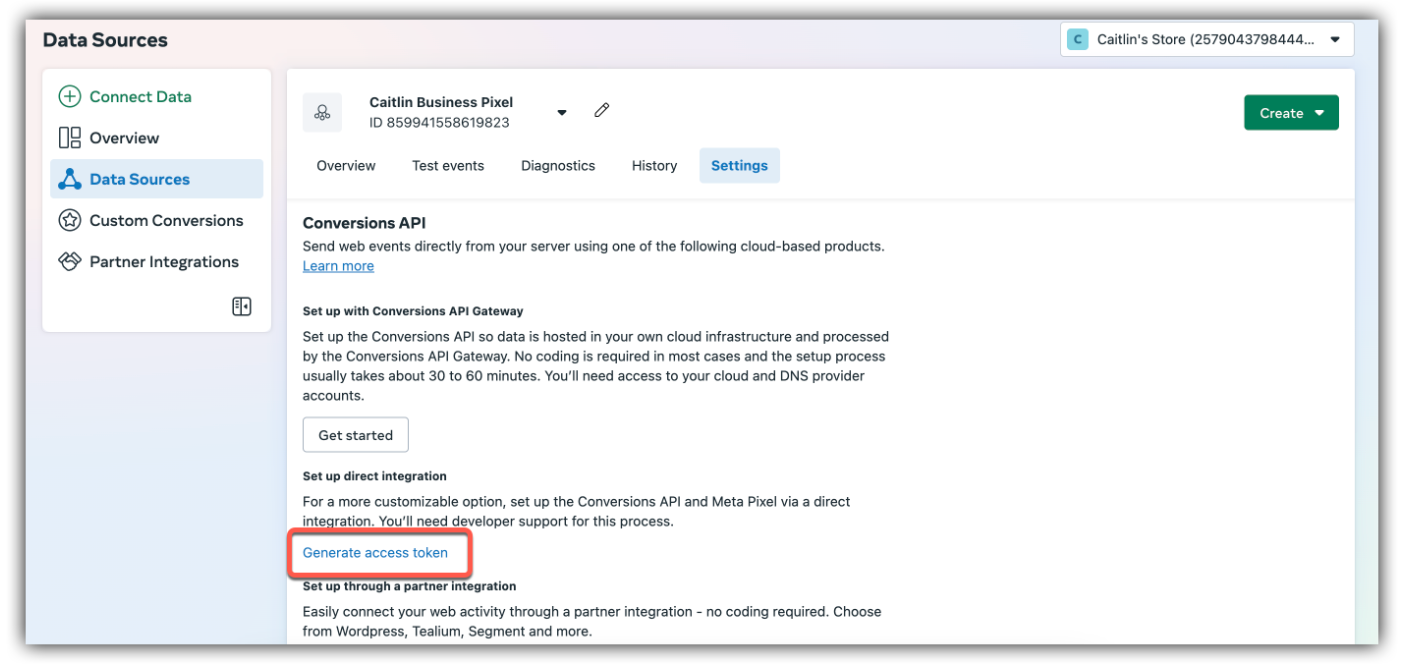
To generate your access token, open the Meta Events Manager, select your pixel, go to its Settings tab and scroll down to the Conversions API section. Click Generate access token.
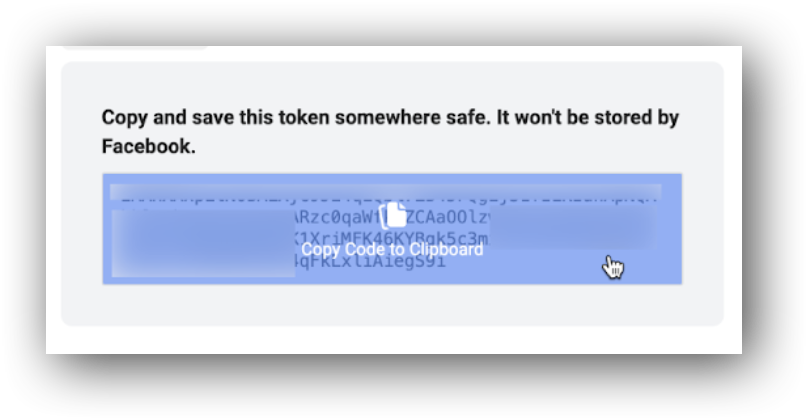
Click the box to copy the token. Meta only shows it once, so paste it somewhere safe.
Head back to Settings > Tracking & Pixels in SamCart, paste your Pixel ID and Access Token, and click Save Changes in the top right corner. That's it! You're done!
This first pixel is your Default pixel. SamCart uses it for every product that isn't assigned to an additional pixel.
Track different products to different pixels
Running more than one brand, or want a product's sales to go to a separate ad account? Add more Meta pixels and choose which products report to each one.
- Go to Settings > Tracking & Pixels.
- Under Additional Meta pixels, click Add pixel.
- Enter a Name, the Pixel ID and that pixel's Access Token.
- Under Products, search for and add at least one product.
- Click Save.

The pixel saves straight away, and you'll see it listed under Additional Meta pixels.

A few things to know:
- Assigned products report only to their pixel, not to your Default pixel as well.
- Removing a pixel sends its products back to your Default pixel.
- Changing a token: click Edit and paste the new one. Leave the field blank to keep the current token.
Events SamCart sends to Meta
Once your pixel is saved, SamCart adds it to every checkout automatically and sends these standard events:
- PageView: each time a visitor loads a checkout or upsell page.
- AddPaymentInfo: when a customer submits their order, before the charge goes through.
- Purchase: when the order is paid.
How purchase events are counted
SamCart sends one Purchase event per order, no matter how many order bumps or One Click Upsells it includes. Once the customer has finished checking out, SamCart sends a single event with:
- The products the customer bought
- The quantity of each item
- The full order total, including upsells and after any coupon discounts
Existing accounts that haven't switched yet still send a separate Purchase event for each charge, so one order with two upsells sends three purchase events.
Check that your events are reaching Meta
The quickest check is inside SamCart. Open any order from Sell > Orders and look at its Events section. You'll see the Meta Purchase event, marked CAPI, and whether it was Delivered. See Check What SamCart Sent to Your Integrations for more.
You can also watch events fire in your browser with the Meta Pixel Helper Chrome extension. Install it, load any SamCart checkout and place a test order to see each event and the data sent with it.

Or use the test events tool in Meta Events Manager. Enter the URL of your SamCart checkout (or the page where you've embedded one), place an order in the tab Meta opens, then go back to Events Manager to see each event SamCart sent.

Remove any duplicate pixels
If you've also added your Meta Pixel by hand, remove it so Meta doesn't receive the same sale twice. There are three places to check.
First, in Settings > Tracking & Pixels, check the Embed HTML/Scripts in Header and Embed HTML/Scripts in Footer boxes.

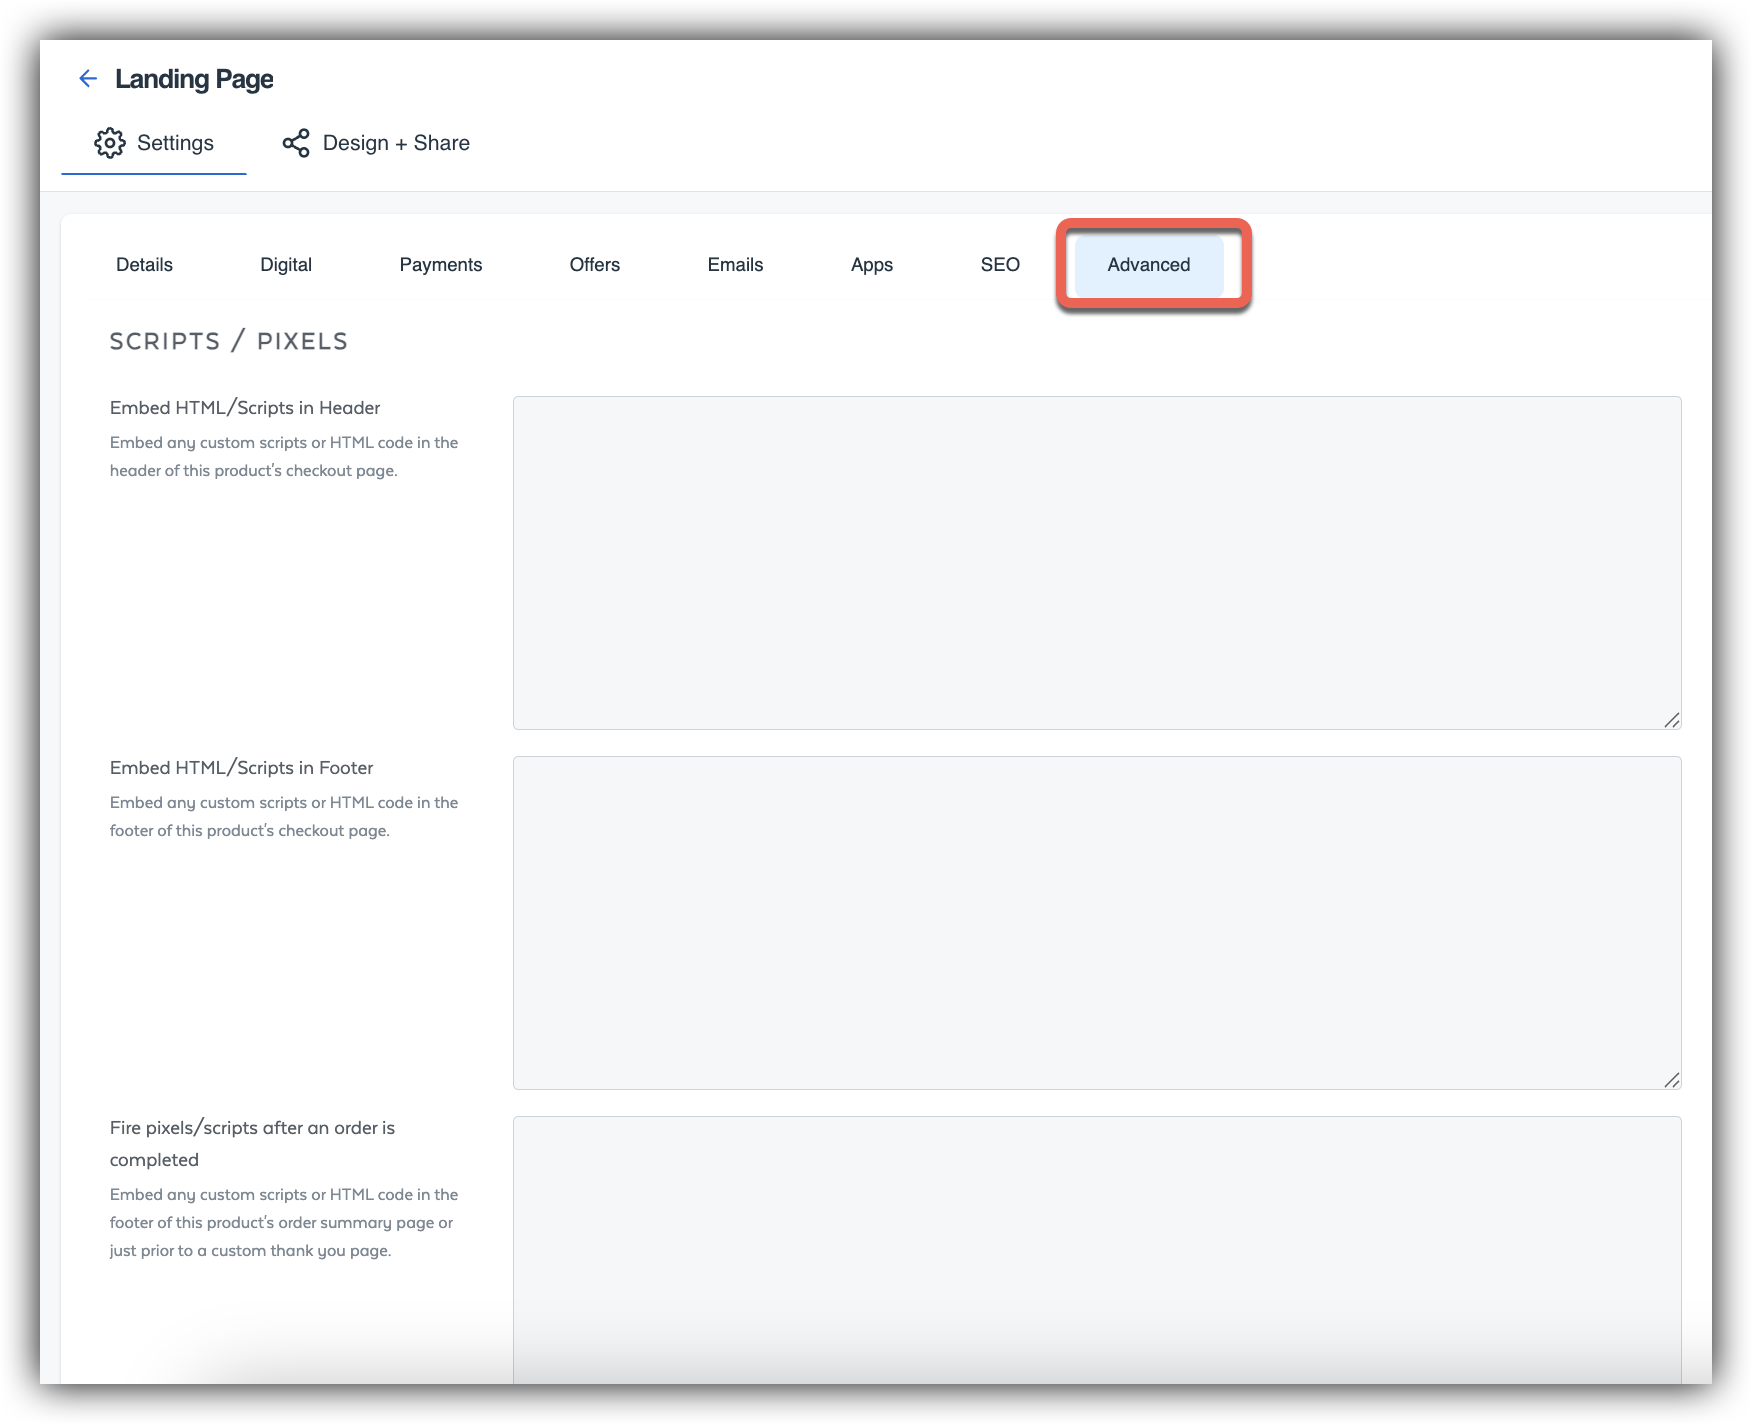
Next, check each product's Advanced settings tab: the Embed HTML/Scripts In Header, Embed HTML/Scripts In Footer and Fire pixels/scripts after an order is completed boxes.
Finally, go to Apps > Installed Apps > Facebook. SamCart creates a tab here for your Default pixel (Facebook Integration) and one for each additional pixel (Meta Pixel: name). Each has two Global rules called Track conversion event. Leave these in place. If you see any other Facebook connection, or purchase rules on the Product Specific or Form Specific tabs, remove them.

You can keep any other scripts in these places. Your Meta Pixel doesn't need to be there.
Sending customers to your own thank you page
If customers go to an external thank you page instead of SamCart's Order Summary page, turn on Fire Pixels Before Redirect in Settings > Tracking & Pixels. This makes sure your sales are tracked before the customer leaves SamCart.

Troubleshooting
Problem: I don't see the Meta Pixel when I load a SamCart checkout.
Solution: Turn off any ad blocker in your browser, since ad blockers can stop the pixel from loading. The Conversions API still reports your sales from SamCart's servers either way.
Problem: My sales are being reported twice in Ads Manager.
Solution: Remove any Meta Pixel you've added by hand. See Remove any duplicate pixels above.
Problem: An order's Events section shows Meta as Failed.
Solution: Click the event to see why. See Check What SamCart Sent to Your Integrations.
Frequently Asked Questions
Q: Do I need to set up integration rules for Meta?
A: No. SamCart creates them for you when you save a pixel. You'll find them under Apps > Installed Apps > Facebook.
Q: I see a Facebook app in Installed Apps that I don't remember setting up. What is it?
A: That's the connection SamCart creates when you save a Meta pixel, with one tab per pixel. It sends your sales to Meta through the Conversions API. If you remove a pixel in Tracking & Pixels, its tab is removed too.
Q: Can I use more than one Meta Pixel?
A: Yes. Add more pixels under Additional Meta pixels and assign products to each. See Track different products to different pixels above.
Q: Do purchase events include coupons, order bumps and upsells?
A: Yes. Coupon discounts are reflected in the value, and order bumps and upsells are included in the single purchase event for the order. On existing accounts that haven't switched yet, each upsell sends its own purchase event.
Q: How do I verify my domain within Facebook?
A: You may wish to verify your SamCart domain inside of Meta. This is optional. First, set up your own SamCart Custom Domain. Then verify it using Meta's DNS verification, which means adding a TXT record at your domain registrar.
To get the verification code from Meta:
- In Meta Business Settings, open the Brand Safety menu and click Domains
- Click Add and enter your root domain (for example yourwebsite.com)
- Select Update the DNS TXT record with your domain registrar
- Copy the TXT record Meta shows you

Then, at your domain registrar:
- Open the DNS records for your domain
- Add a TXT record
- Type @ into the Name/Host field
- Paste the code from Meta (for example facebook-domain-verification=xxxxxxxxxxxxxx) into the Answer/Content field
- Click Save

After a few minutes, go back to Meta and click Verify domain. Once verified, your domain appears in Meta's web event settings, so you can choose which conversion events your ads optimise for.