Everything in SamCart starts by creating a product. Follow this guide to create your first (or next!) product, so you can start selling immediately.
Creating Your First Product
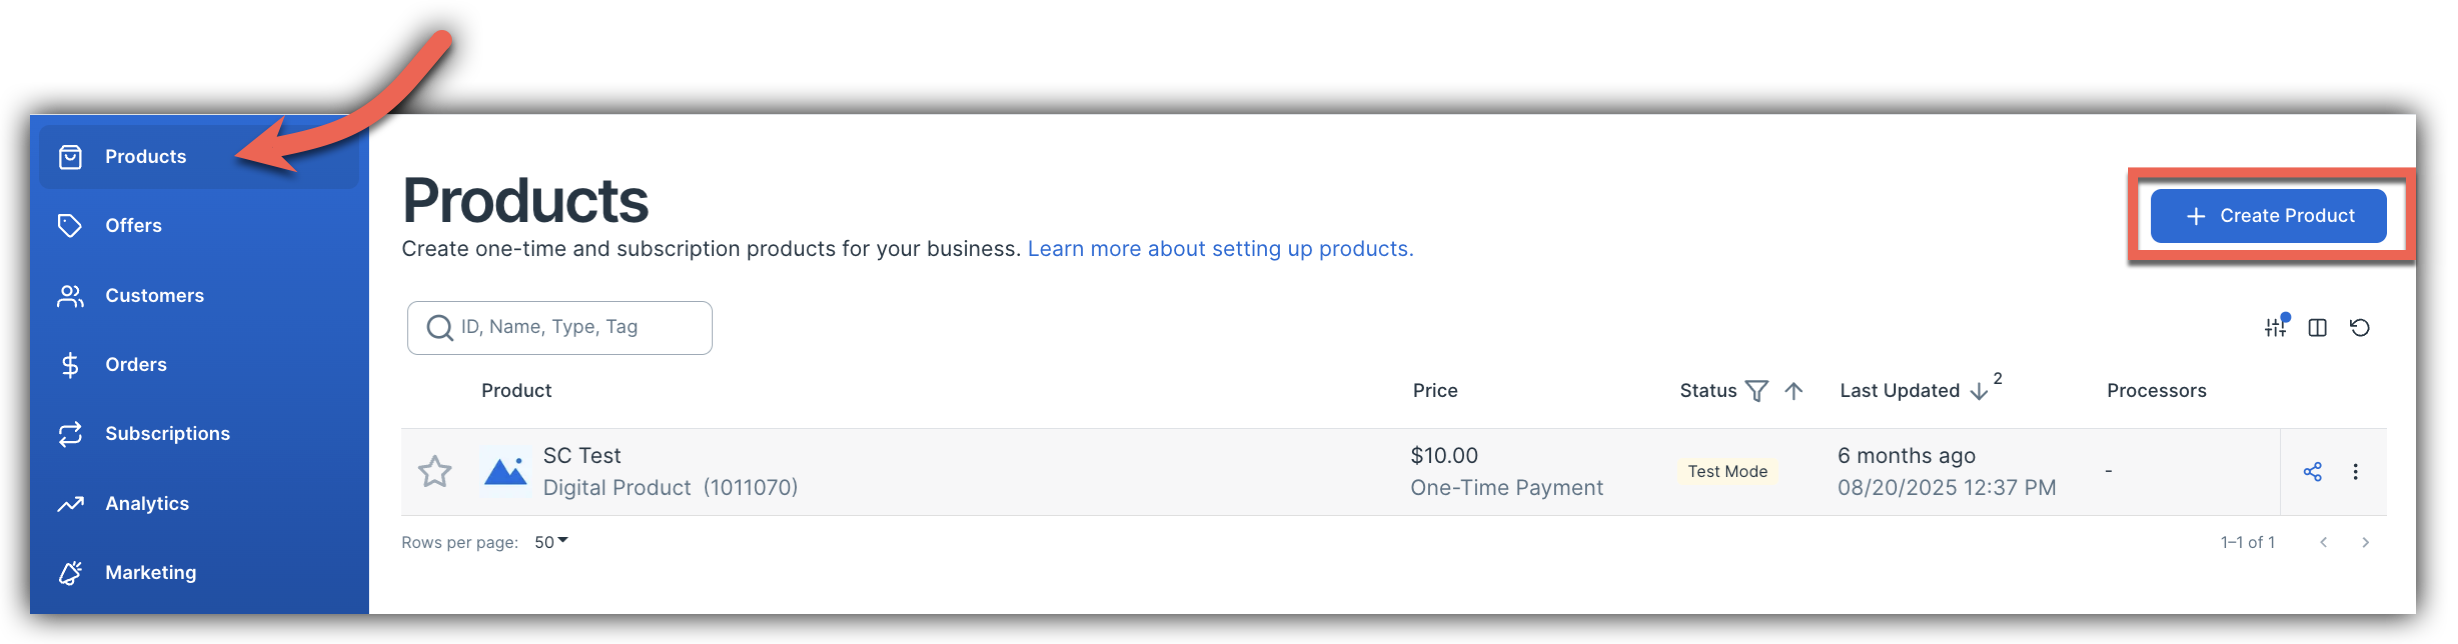
To create your first product, click the Products button in your left-hand sidebar. Then click the + New Product button in the top right corner of your screen:
After clicking + New Product you will see a slide-out window where you can enter the details of your product. All new products will have the following fields:

- Product Name (1): The public-facing name of your product that will display during checkout, on the order summary page, order receipts, etc.
- Product Type (2): Select whether you want to sell a Digital Product or Service, Physical Product, Digital Subscription or Physical Subscription. These product types will have slightly different options that when creating the product. Continue reading to learn more about these product types and the options that appear when they are selected!
- Pay What You Want (3): A toggle option that, when turned on, allows customers to choose their own price. Check out our Pay What You Want article to learn more!
- Product Price (4): Add a price for your product here.
- Collect Taxes (5): Enable this setting to collect taxes on this product.
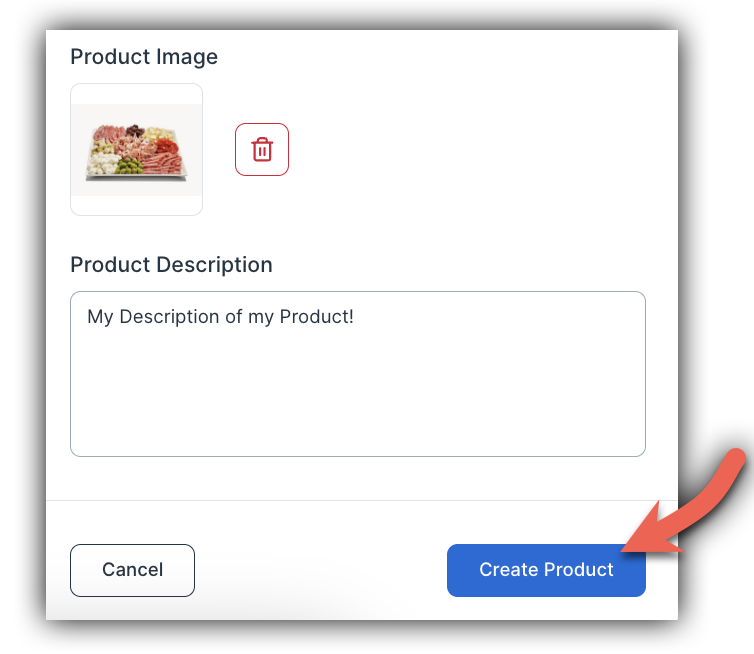
- Product Image (6): Upload an image for of your product for your checkout form.
- Product Description (7): A tweet-length description of what you're selling (optional).
- Add Digital Download (8): If you selected a Digital Product type - this setting will appear. Upload your digital download of your product.
Product Types
As mentioned above, there are four different product types available with SamCart - Digital Product or Service, Physical Product, Digital Subscription or Physical Subscription. Please read below to learn more about each product type and see how to set it up!
Digital Product or Service
If you would like to sell a digital product or service, select Digital Product or Service as the Product Type. Then, choose the one-time price for your product, enter it in the Product price section. The most import part for this type of product is to Upload your Digital Download. Uploading your digital download when you first create the product ensures that customers receive their purchased files immediately after completing their transaction. If the file isn't attached during setup, customers won't receive what they paid for, leading to potential refund requests or disputes.

That's it, your product is created! After clicking Create Product you will be taken to the Product Details page where you can start customizing your product.
Physical Product
If you would like to sell a physical product, select Physical Product as the Product Type. You will then choose the one-time price for your product, enter it in the Product price section. You can choose to add a Description and upload an Image if you choose!
Once that is complete, your product is created! After clicking Create Product you will be taken to the Product Details page where you can start customizing your product.
Digital and Physical Subscriptions
If you would like to sell a subscription based product, select Digital Subscription or Physical Subscription as the Product Type. Subscription products have a lot more detailed settings compared to one-time payment products, so let's dive into each setting!
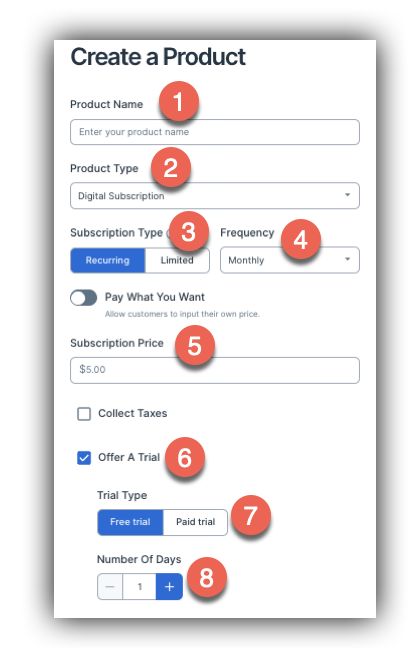
- Product Name (1): The public-facing name of your product that will display during checkout, on the order summary page, order receipts, etc.
- Product Type (2): Choose either if the product is a Digital or Physical Subscription.
- Recurring or Limited (3): This decides whether your subscription will be a Recurring Subscription or a Limited Subscription. Recurring subscriptions will charge forever, unless the are cancelled. Limited subscriptions will charge for a set amount of time and then end.
- Frequency (4): This setting decides how often your customers will get charged, with the options being Weekly, Monthly, Quarterly, Yearly, or Custom (if Custom is selected, a No. of Days option will appear where you can enter a number of days to create a custom charge schedule).
- Subscription Price (5): This is the price that customers will be charged for each subscription charge, whether it is recurring or limited.
- Trial Period (6): The Trial Period setting, when toggled on, allows you to give your customers a trial period. If you would like to offer a trial with your subscription, toggle on the Trial Period!
Note - The next 3 settings will only appear if the Trial Period is toggled on. - Free Trial or Paid Trial (7): This decides whether the trial you are offering will be free or paid. Free trials will allow customers to have the subscription for free for a bit of time before being charged, while paid trials will charge customers a fee for the trial period.
- Trial Period (8): The trial period is the number of days that you want your trial period to last for this subscription (for example if you want a 1 week trial period, you would enter "7" in this setting).
- Initial Price (8): This is the price that customers will be charged for their Paid Trial period. This will be a one time charge that occurs when the trial begins, then after the Trial Period is over they will be charged the normal Subscription Price.
Note - When Free Trial is selected in Step 6, this option will not be available. You will only see Trial Period.
Finally, you just have to click Create Product, and you're done! Your digital subscription is created. After clicking Create Product you will be taken to the Product Details page where you can start customizing your product.
Product Details
After your Product is created, you'll be immediately taken to the Product Details page. Here, you'll be able to edit the basic details of your new product. Things will look slightly different based on what kind of product you created, but all product types will have the same basic details. Let's briefly touch on a couple of the important settings you'll find here:
- Product Image: A visual that shows what your product is or does. Product Images are used in a number of different places like receipts, order summary pages, and more.
- Order Redirect: This is either the URL you'd like to refer your customers to after they purchase this Product, or - if you do not redirect them - the place to include a custom message in the Order Summary page. You can read more about this setting here.
Physical and Digital Settings
Once you've created your product and checked out the product details tab, it's time to head over to either the Physical or Digital tab!
If you have created a Physical product, you will see the Physical tab in your product settings. Here you can create product specific shipping settings for your physical product! Check our our Shipping for Physical Products article to learn more. If you have created a Digital product, you will see the Digital tab in your product settings. Here you can decide what kind of digital product or service you want to offer, and upload any digital products that you want your customers to receive when they purchase your product! Check out our Delivering Digital Files article to learn more.

